
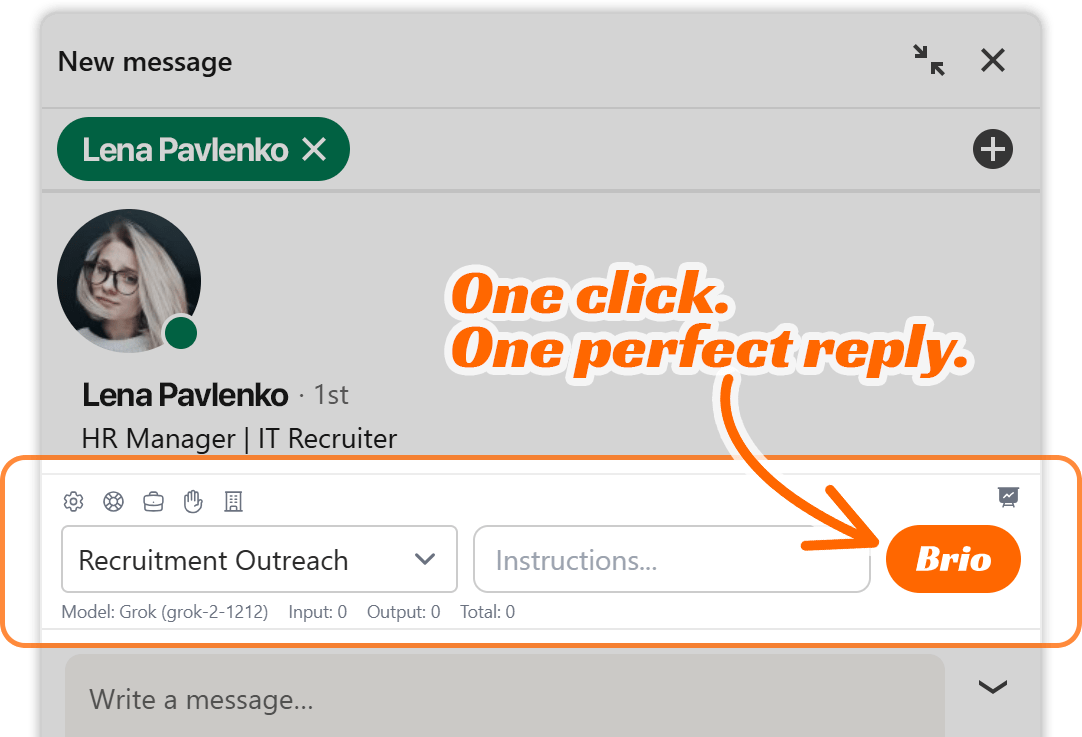
Brio is a powerful messaging extension designed to help professionals—especially in sales, recruiting, and business development—craft smarter LinkedIn messages using real-time AI assistance. With customizable engagement profiles, CTA triggers, and deep conversation analysis, Brio transforms everyday messaging into strategic, high-impact conversations.
If you’re just getting started, this guide walks you through the two most essential steps to begin using Brio effectively:
- Creating Your First Engagement Profile
- Selecting an API Provider and Model
Let’s break it down in plain language, so you can move from setup to sending your first smart reply with confidence.
1. Creating Your First Engagement Profile
Before Brio can generate any messages, it needs context. That context is stored in what we call an Engagement Profile. Think of this profile as your AI assistant’s brain—it tells Brio what kind of conversations you’re having, what you’re trying to achieve, what resources it can use, and how it should sound when responding.
Creating your first engagement profile is easy and takes just a few minutes. Here’s how to do it:
Step-by-Step: How to Create an Engagement Profile
- Open Brio Settings
Click the Brio icon from your extension interface and choose “Settings.” - Go to the Engagement Profiles tab
You’ll find four tabs across the top of the settings panel:- Account & Preferences
- API Integration
- Engagement Profiles
- Data Management
Click on Engagement Profiles.
- Click “Add Engagement Profile”
You’ll see a large orange + Add Engagement Profile button. Click that to start creating your profile.
What You’ll Be Asked to Fill In
Brio will prompt you for a few key inputs that define how your assistant should behave:
Profile Name
This is the label for your engagement profile. Name it based on the type of conversations you’ll be having. For example:
- “Recruitment Outreach”
- “Sales Follow-Up”
- “Investor Relations”
- “B2B Cold Messaging”
You can create multiple profiles later, each with its own tone, resources, and goals, but for now just choose one main focus.
Select API
This is where Brio connects to an AI provider. More on this in section 2—but for now, select the API you’ve integrated (such as OpenAI, Grok, DeepSeek, or Gemini).
Select Model
Depending on the provider you chose, you’ll see available AI models. For example:
- Grok users might see “Grok-2 1212 (Stable Release)”
- OpenAI users might see “gpt-4-turbo” or “gpt-3.5-turbo”
Select the model you prefer based on your budget and responsiveness needs. We’ll dive into choosing the right provider and model in the next section.
Call-to-Actions (CTAs): Guiding Your Conversations
Call-to-Actions are short links, contact points, or messages that you want Brio to suggest during conversations. These are crucial because they guide leads or prospects to your website, scheduler, email, or signup form.
You’ll see fields labeled:
- Enter CTA Name
- Enter CTA Value
Example CTA entries:
- Name: “Learn about SkillSeek opportunity”
Value:https://skillseek.eu/for-recruiters/ - Name: “Email me”
Value:darius@skillseek.eu - Name: “Call me”
Value:+37012345678
Click “Add CTA” after each one, and it will appear below as a saved action. Brio will then analyze these CTAs and determine the best time to suggest them based on message content.
Brio doesn’t just blindly throw links into conversations. It strategically analyzes the recipient’s messages, picks up on keywords, and recommends the most relevant CTA based on intent, tone, and topic alignment.
Sales Resources: Add Supporting Links
Brio also allows you to feed it extra reading material—your website, service pages, blog posts, or knowledge base articles. Brio reads and understands this content to strengthen future replies.
In the Sales Resources section, add:
- Resource Name – Give it a title like “Freelance Recruiting” or “Partner Program”
- Resource URL – A live link to the page
Click “Add Resource” for each one. Brio will run internal prompts to extract:
- Facts and figures (e.g., prices, policies, percentages)
- Concepts and core ideas
- How-to methods and procedures
- Practical use cases and real-world examples
- Situational context like audience, industries, or regions
This allows your AI assistant to sound like someone who knows your business inside and out.
Business Overview: Teach Brio Who You Are
At the bottom of the profile form is the Business Overview section. This is where Brio gets to know your operation. You can either:
- Paste in a detailed description of your business, or
- Use the “Generate Analysis” button if you’ve added resources already
What should be in this section?
- A short summary of your product or service
- Your pricing model or fee structure
- Milestones or steps in your process
- Benefits of joining or working with your business
- Target audience and market
If you’re a recruitment platform like SkillSeek, for example, your overview might include:
- Membership pricing
- Commission structure
- Placement process
- Retention policies
- Who it’s for (freelancers, recruiters, etc.)
Brio uses this business overview to personalize every response it generates. The more you include, the smarter it becomes.
Saving Your Profile
Once everything is filled out:
- Double-check your CTAs and links
- Make sure you’ve selected the API and model
- Ensure your Business Overview is complete
Then click “Save Profile”
Congratulations! You’ve now created your first Engagement Profile.
2. Selecting an API Provider and Model
Brio doesn’t run its own AI engine—it connects to leading AI providers through APIs. You decide which engine powers your responses.
When you first open Brio, you’ll be asked to integrate with one or more API providers. You can do this anytime from the API Integration tab in settings.
Supported AI Providers (As of Now):
You can add as many as you want, but your Engagement Profile will only use one at a time.
Step-by-Step: How to Add an API Key
- Go to Settings > API Integration
- Click “+ Add New API”
- Choose your provider from the dropdown
- Enter your API key (you’ll get this from the provider’s developer dashboard)
- Click Save
Brio will automatically detect which models are available under that provider and show them when creating a profile.
Choosing the Right Model
Here’s a quick guide to help you choose the right model depending on your needs:
1. Grok (xAI)
- Model:
Grok-2 1212 - Pros: Fast, context-aware, designed for conversational tone
- Best for: Real-time LinkedIn messaging, professional outreach, persuasive writing
- Notes: Ideal for users wanting a balance between performance and affordability
2. OpenAI
- Models:
gpt-3.5-turbo,gpt-4,gpt-4-turbo - Pros: Very strong reasoning, nuanced understanding, huge ecosystem
- Best for: Complex language tasks, global outreach, precise tone shifts
- Notes: GPT-4-Turbo is fast and capable but may have higher costs at volume
3. DeepSeek
- Pros: Efficient and lightweight, good factual accuracy
- Best for: Knowledge-focused responses, less persuasive but solid
- Notes: Great if you want conservative, data-driven replies
4. Google Gemini
- Pros: Visual and contextual awareness (when available), multilingual edge
- Best for: Teams working in diverse language regions or visual contexts
- Notes: Still evolving in terms of direct conversation strategies
What to Consider When Choosing a Model
Here are some practical factors to weigh when selecting your AI engine:
- Message Length and Style: Do you want short, punchy messages or longer, story-based narratives?
- Cost Efficiency: Some models (like GPT-4) are more expensive than others. If you’re sending hundreds of messages a day, Grok or GPT-3.5 might offer better value.
- Speed of Generation: Brio performs best with low-latency models—Grok and GPT-3.5 are generally faster than GPT-4.
- Tone Adaptability: GPT-4 and Grok-2 are both excellent at switching tone between professional, persuasive, casual, or formal.
- Context Retention: Models that maintain more memory across messages (like GPT-4-Turbo) can better adapt to conversation threads.
You can always test different models by creating multiple Engagement Profiles using different APIs to see which one works best for your use case.
Switching Models Later
Once your profile is saved, you can always come back to:
- Switch the model (e.g., from Grok to OpenAI)
- Change CTAs
- Add new resources
- Rewrite your Business Overview
Just click the pencil icon next to the profile name under Engagement Profiles and make your changes.
Summary
To summarize, getting started with Brio involves two simple yet powerful setup steps:
- Creating your first Engagement Profile tells Brio what kind of conversations you’ll be having, what resources to use, and what tone to take.
- Choosing an API provider and model defines the brain behind the messaging—balancing speed, quality, cost, and adaptability.
Once both are set, Brio can begin analyzing your LinkedIn conversations, pulling relevant info from your business, and generating strategic, personalized messages with CTAs that make sense for each recipient.
This is where Brio starts to shine—not just writing messages, but driving real conversations that convert.